Installing a faucet for your bathtub or shower isn’t as simple as installing one on a sink. You need access to the framing behind the enclosure so you can secure the valve assembly, and for this reason, plumbers usually install these valves before the walls are covered over. If you are upgrading your current faucet and the builder didn’t create an access panel, wall demolition and rebuilding may be part of the job.
Installing the Framing
You usually have to install special framing to hold a tub or shower valve. It consists of a pair of vertical studs spaced far enough apart for the valve to fit between them and a horizontal block to which to secure the valve. You also need blocks to which to attach the pipes that go to the tub spout and the showerhead. Consult the valve specifications before installing the block for the valve so that you’re sure to offset it the proper distance behind the wall. If it’s too close, the handle will stick out from the wall, and if it’s too far, you won’t be able to assemble the faucet.
Roughing in the Water Pipes
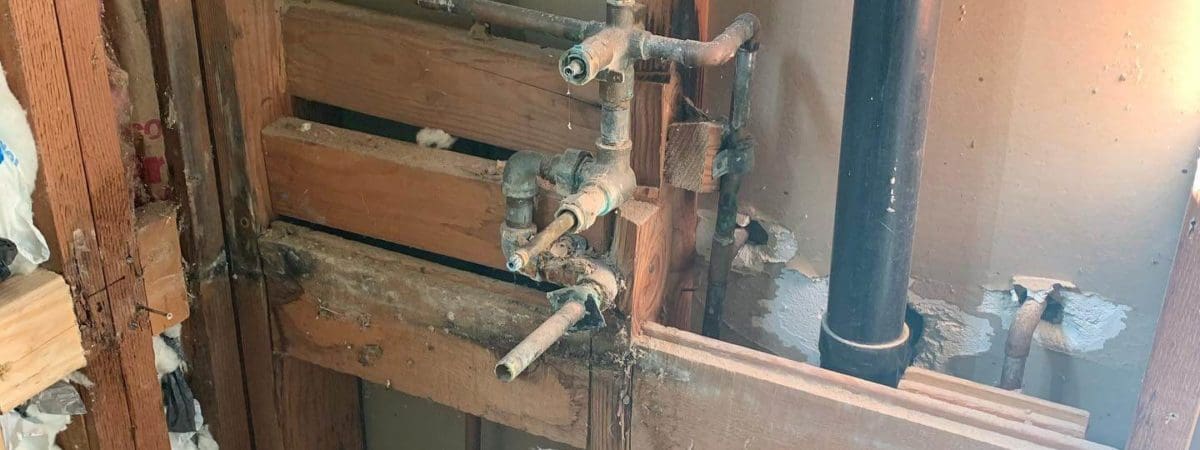
The rough-in plumbing for a tub or shower valve consists of two 1/2-inch supply pipes — one hot and one cold. If you’re installing a new shower or tub and you hire a plumber to do the rough-in, you’ll usually see the pipes stubbing up into the wall from the floor below. They should connect to 3/4-inch main water lines; if you branch them from a 1/2-inch line, you’ll have water pressure problems. When retrofitting an existing shower, you can cut the supply pipes at any convenient location inside the wall to create the stub-outs for the new valve.
Connecting the Valve
Tub and shower valves can have brass slip-connections that require you to solder copper pipe directly to the valve, but you’ll more often find 1/2-inch threaded pipe connections to which you screw adapters. It’s important to seal these adapters with plumbing tape before screwing them onto the valve because once you start using the faucet, leaks behind the wall could be disastrous. Secure the pipes coming into the valve to the framing, using pipe clamps, to prevent them from knocking. The pipes that go from the valve to the spout and shower head terminate with 1/2-inch brass elbows into which you screw the spout nipple and shower arm.
Finishing the Installation
After completion of the valve installation, you must cover the shower or tub wall if you had to demolish it or if it’s a new installation. The holes for the spout and shower arm should be slightly larger than the pipes that go in them, or about 5/8 inches in diameter, and the gap between the wall covering and the valve shouldn’t be more than about 1/2 inch. Screw the shower arm into the fitting on top and the tub nipple into the one on the bottom and install the faucet handle. Faucets typically come with escutcheons to hide the gaps between the pipes and the wall.